In this guide, we’ll explore what JAMstack is, what kinds of websites web developers build with it, how we can take advantage of its benefits, and we’ll even build a project using this technology in the “Practice” section.
Introduction
JAMstack is a software architecture and philosophy based on the following components:
- JavaScript,
- API,
- Markup.
If this sounds familiar, it’s because it is! For example, do you have a React app that you compile with Webpack and ultimately host on S3? Yes, that’s a JAMstack app.
A simple HTML file that has no JavaScript and literally does nothing dynamic? Yes, that’s also a JAMstack application.
If you’re more focused on cloud technologies (such as AWS, GCP, or Azure), you might be inclined to think of serverless and JAMstack as one and the same. Of course, they share common traits in their resource management philosophy—for example, hosting a website on S3. But a JAMstack application isn’t always serverless.
Consider an application hosted in static storage with your chosen cloud provider. Yes, you can run the application in a serverless manner, but you might be dealing with an API that uses WordPress or Rails, which are certainly not serverless.
Combining these philosophies can be very meaningful, but they should not be confused or presented as the same thing.
Components of JAMstack
Let’s return to the JAMstack: it typically consists of three components—JavaScript, APIs, and Markup. Its history is tied to the evolution of the term “static site” into something more meaningful (and in demand in the market).
Thus, while the end result is ultimately a static site, it is enhanced by the inclusion of top-tier tools at every stage.
While there isn’t a specific set of tools you need to use—or any tools beyond simple HTML—there are excellent examples of what can make up each part of the stack. Let’s dive a little deeper into each component.
JavaScript
The component that has likely done the most to popularize JAMstack is JavaScript. Our favorite browser language allows us to provide all the dynamic and interactive elements that we wouldn’t have if we were serving plain HTML without it.
This is where you’ll often see UI frameworks like React, Vue, and newer ones like Svelte come into play.
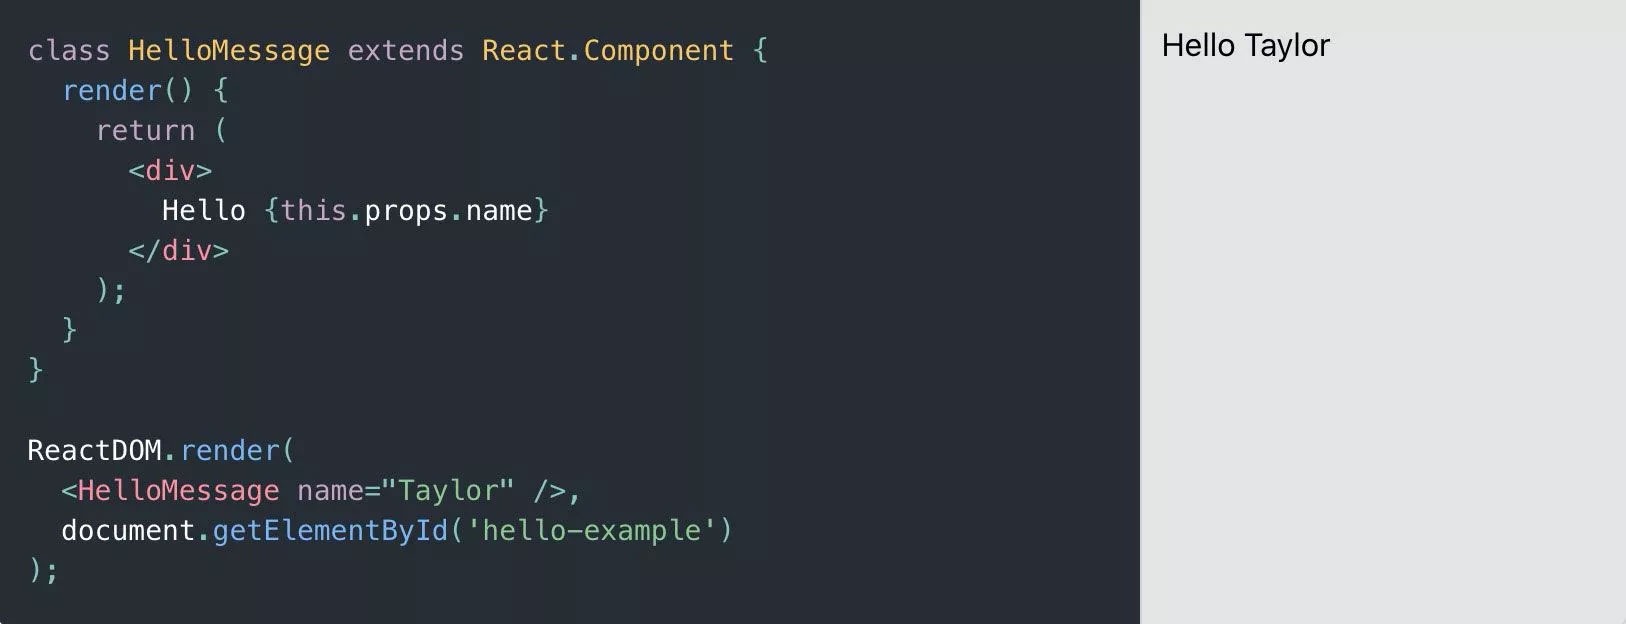
They make building applications simpler and more organized by providing component APIs and tools that compile into a single HTML file (or a set of them).
These HTML files include a group of resources—such as images, CSS, and the actual JavaScript—which are ultimately delivered to the browser via your preferred CDN (content delivery network).
APIs
Leveraging the strengths of APIs is the foundation for making a JAMstack application dynamic. Whether it’s authentication or search, your app will use JavaScript to send an HTTP request to another provider, which will ultimately improve the user experience in one way or another.
The team at Gatsby coined the term “content mesh,” which describes these capabilities quite well.
You don’t have to rely on just one host for your API; you can use as many as you need (but try not to overdo it).
For example, if you have a headless WordPress API where you host your blog posts, a Cloudinary account where you store your specialized media files, and Elasticsearch, which provides search functionality, they all work together to deliver a high-quality, unified experience for people using your site.
Markup
Markup. This is a critical part. Whether it’s hand-coded HTML or code that compiles to HTML, this is the first thing you serve to the client. It’s a sort of de facto part of any website, but how you serve it is the most important part.
To be considered a JAMstack application, the HTML must be served statically, which basically means it won’t be dynamically rendered from the server.
If you’re assembling a page and serving it using PHP, then it’s most likely not a JAMstack application. If you’re uploading and serving a single HTML file from a storage service where the application is built using JavaScript, that sounds like a JAMstack application.
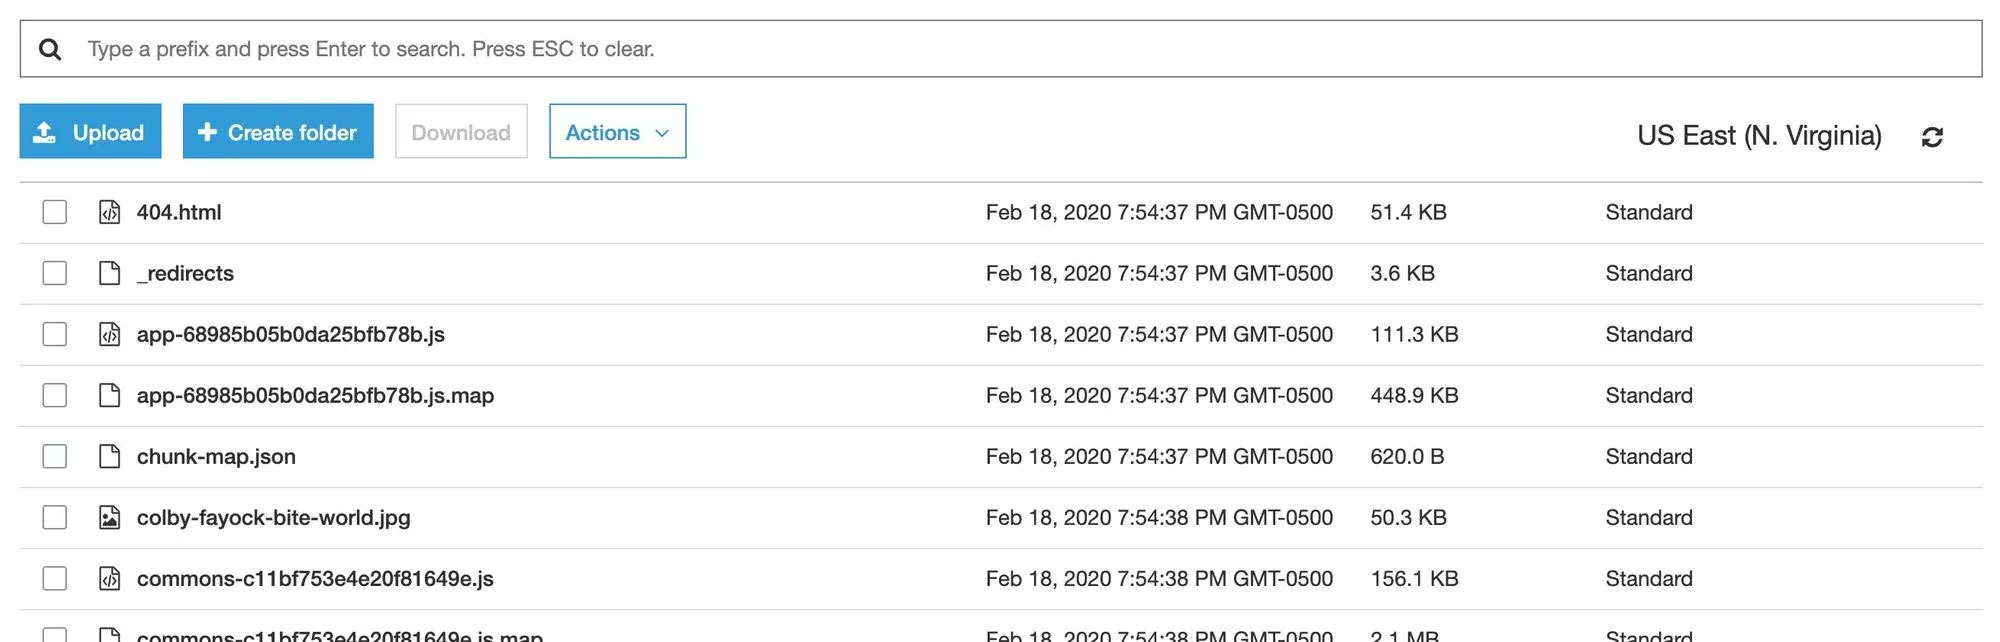
But that doesn’t mean we always have to build 100% of the application inside the browser. Tools like Gatsby and other static site generators allow us to fetch some or all of our API sources during the build process and output pages as HTML files.
Consider this: if you have a WordPress blog, we can fetch all the posts and, ultimately, generate a new HTML file for each post. This means we can serve a precompiled version of the page directly in the browser, which typically results in a faster first render and a faster experience for your visitor.
We mentioned the three components (JavaScript, API, Markup) earlier, but what we didn’t mention is that you don’t necessarily have to use all three of them for your site to be considered a true “JAM” site.
In fact, it all comes down to the markup and how you serve it. Instead of having your Rails application render your HTML for you, you can host a precompiled React application on S3 that communicates with Rails via a set of APIs.
But you don’t even need APIs. You don’t even need JavaScript! As long as you serve an HTML file without having to compile it on the server during a request (i.e., pre-rendering), you have a JAMstack site.
Hosting
Using the term “hosting” here can be misleading if you’re new to this concept. Yes, your site is technically hosted somewhere, but not in the traditional sense. You don’t have a server onto which you upload files using an FTP client like Cyberduck.
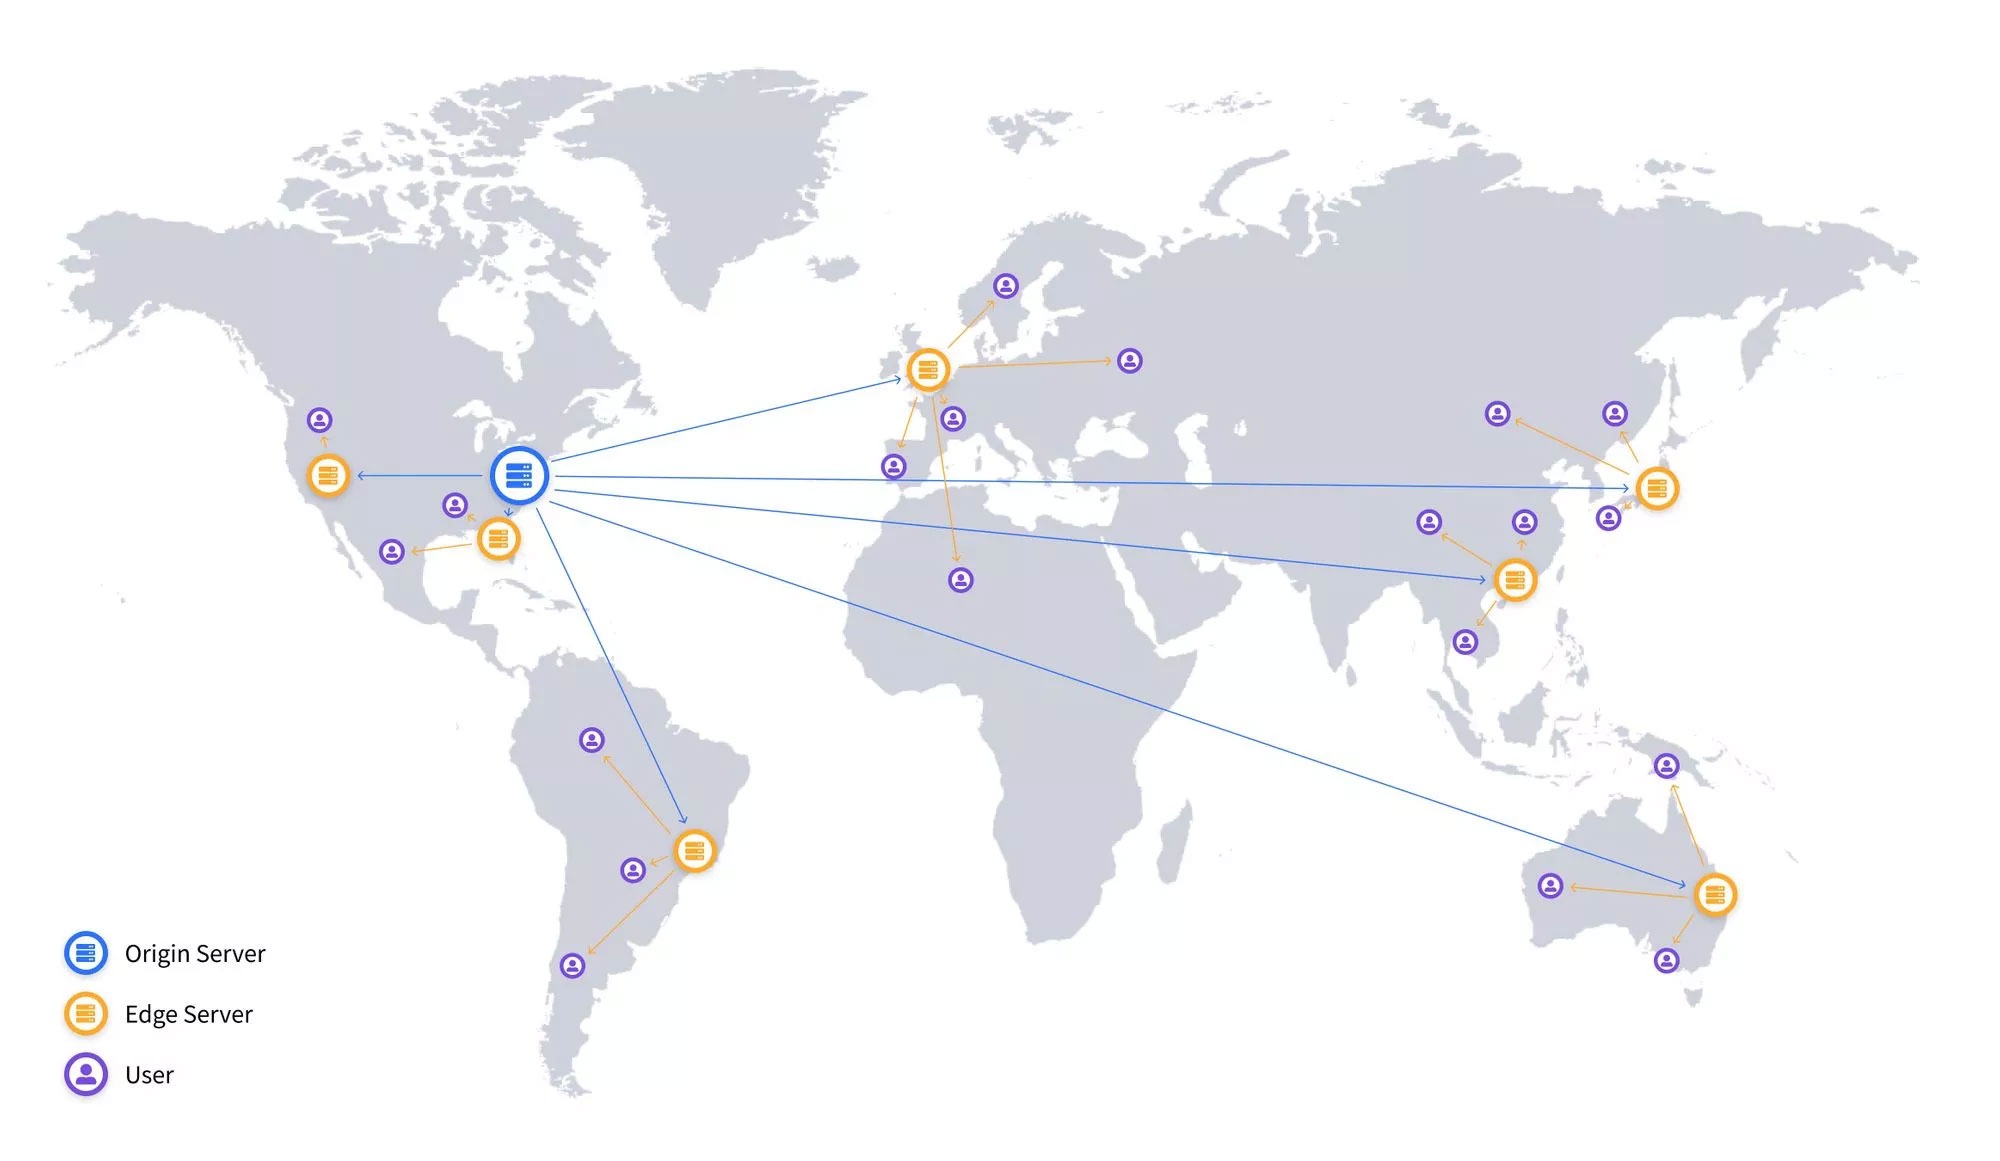
Instead, whether you’re setting it up yourself using S3 or connecting it to Netlify (which is actually multi-cloud), your HTML and static resources are served from object storage. Ultimately, you usually have a CDN, such as Cloudflare, that caches these files in locations around the world, speeding up page loads for people visiting your site.
Why JAMstack
JAMstack applications, by their very nature, satisfy most, if not all, of the five core principles of the AWS Well-Architected Framework. These are the core concepts that AWS considers when building fast, secure, high-performance, fault-tolerant, and efficient infrastructure.

Speed
The fact that you serve JAMstack applications as static files directly from a CDN (typically) means your application is likely to load very quickly. Gone are the days when a server had to spend time building a page before responding; now you serve the page as plain HTML “as-is” or with some form of client-side hydration, as is the case with React.
Cost
In most cases, JAMstack sites are cheaper to launch than their server-side counterparts. Hosting static resources is inexpensive, and pages are served just as fast, if not faster.
Scalability
Since you serve your files from static hosting—most likely via a CDN—this essentially gives you infinite scalability automatically. Most providers support this, which means you won’t have any trouble ensuring that any influx of visitors to your site can interact with it seamlessly.
Maintenance
The backbone of your static site isn’t a server, which means you don’t need to maintain it. Whether it’s Netlify, S3, or any other provider, your static HTML, CSS, and JS are hosted without any hassle.
Security
By eliminating the need to personally maintain servers, you don’t have to worry as much about blocking security breaches.
Instead, you should focus primarily on permissions to restrict access to private content and reassure your users that their personal information isn’t publicly accessible.
API Dependency
Although the points above apply to the static aspects of your site, keep in mind that you may still rely on some type of API for client-side functionality.
Whenever possible, try to handle these requests during compilation, for example, using a static site generator. Otherwise, you’ll need to weigh the number of requests you make to a dynamic endpoint and how that affects all the points listed above.
JAMstack Examples
freecodecamp.org
Yes! freecodecamp.org and its learning portal are a JAMstack site built on Gatsby. Even despite the challenges of delivering an application for programming courses, freeCodeCamp is able to combine the power of a static site generator with robust APIs to give people around the world the opportunity to learn to code.
You can watch Quincy from freeCodeCamp talk more about this at JAMstack_conf 2018.
Note: News portals and forums are not currently considered JAMstack sites.
impossiblefoods.com
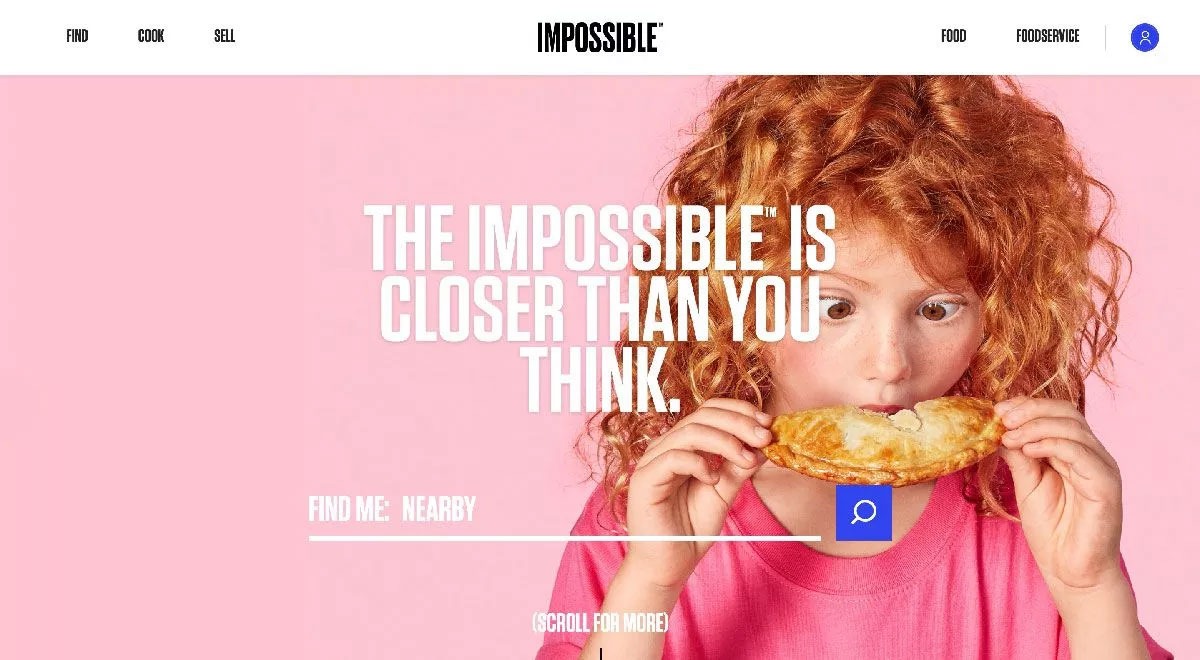
The Impossible Foods homepage is none other than a Gatsby site! Everything from their recipes to their location finder is built using our favorite “lightning-fast” static site generator.
web.dev
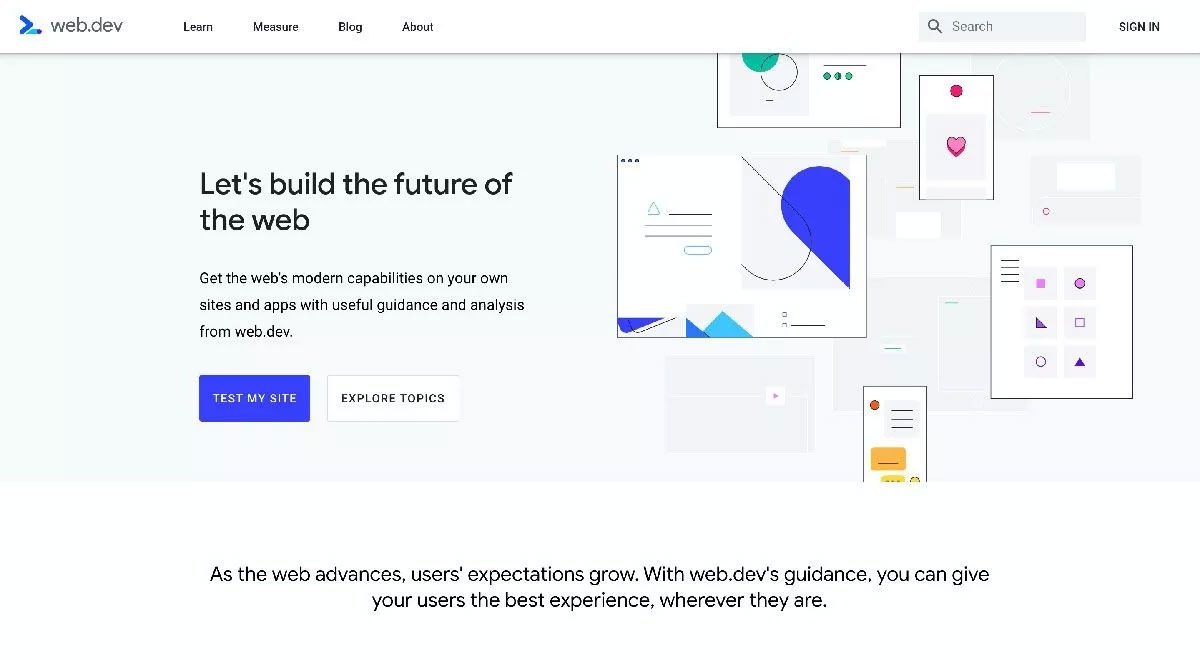
Google’s web.dev resource center is built using the rapidly growing 11ty. You can even find the open-source code at:
Tools
The good news is that there are plenty of tools available right now, with many more on the way. They may still be a little “rough around the edges,” but that’s because this is a brave new world of tools, and it just needs a little polishing to get the results you want.
Building Your App
This is the most exciting part. How are you going to build your app? With Scully, you can choose your favorite UI framework and get started right away. Here are a few popular—but by no means exhaustive—options:
- 11ty
- Gatsby
- Hugo
- Nift
- Scully (for Angular fans)
- and others
Maintaining Your Application
I like to think of this as a simple part that depends on your settings. Tools like Netlify and Zeit simplify setup by connecting to your GitHub repository and deploying every time a new commit is made, but of course, you have options like AWS if you want more control.
- AWS
- Azure
- GCP
- GitHub Pages
- Netlify
- Surge
Making the App Dynamic
In reality, this could be anything that can be used as an API for requests from a browser. I’m not going to list a bunch of examples for each type, but here are a few tools and places where you can find the resources you need.
- Auth0 — Authentication
- Cloudinary — Media Management
- Google Analytics — Analytics
- Sanity — CMS
- Snipcart — E-commerce
- Stripe — Payment Processing
Next, we’ll take a closer look at Jamstack solutions and build a useful app.
Building an Application
In this section of our guide, we’ll explore how to use the React Next.js framework with Strapi to build a portfolio website.
Next.js is a lightweight framework for static and server-rendered React applications, also built on React.
A key feature of Strapi is that it’s an open-source framework based on Node.js and built by developers for front-end developers.
What We’ll Be Doing
It doesn’t matter whether the website you’re building is a personal site, a portfolio site, or a company website. The same tools apply.
The CMS we’ll be using is Strapi, which is free, offers excellent customer support, and is open-source.
Strapi CMS is what’s known as a standalone CMS or a headless content management system. Essentially, this means it serves as the server-side component of your website.
Other CMS platforms, such as WordPress, include the public-facing part of the website within the same application as the server-side component. This often results in a website that’s slow and difficult to manage. But as a JS developer who isn’t a big fan of PHP, I might be a little biased here.
WordPress now supports being used as a standalone headless CMS. However, I won’t be trying that because of… well, you know… PHP.
In any case, let’s start building a website with Next.js. Project repository:
https://github.com/Devalo/create-portfolio-with-next-strapiPlanning
So what exactly are we going to build? As mentioned earlier, a simple online portfolio. We should be able to log in and create, edit, and delete posts. Visitors will browse all posts and click on a specific post to view its full history.
The front end will be built using Next.js version 10. It will retrieve data from the Strapi API. We’ll use Bootstrap 5 for our layout. Bootstrap 5 has just come out of beta, so we should be ready to work with it!
After some sketches on paper, the layout will look something like this:
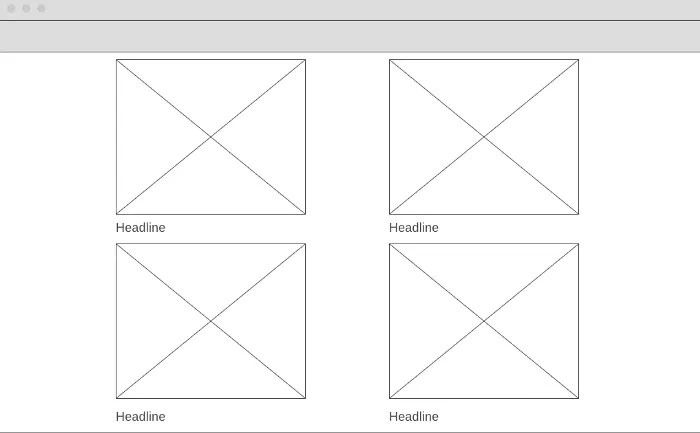
Nothing special—just a pretty simple layout. Well, let’s finally create a new Next.js project.
Creating a New Next.js Project
To create a new Next.js project, you’ll first need to install Node.js. If it’s not already installed, visit https://nodejs.org/ and install Node.js before continuing.
Next.js comes with a very good project generator. We’ll create our new project by typing:
$ npx create-next-app my-portfolioThis will create a new project for us. We’ll navigate into it (cd) and run:
$ cd my-portfolio
my-portfolio $ npm run dev
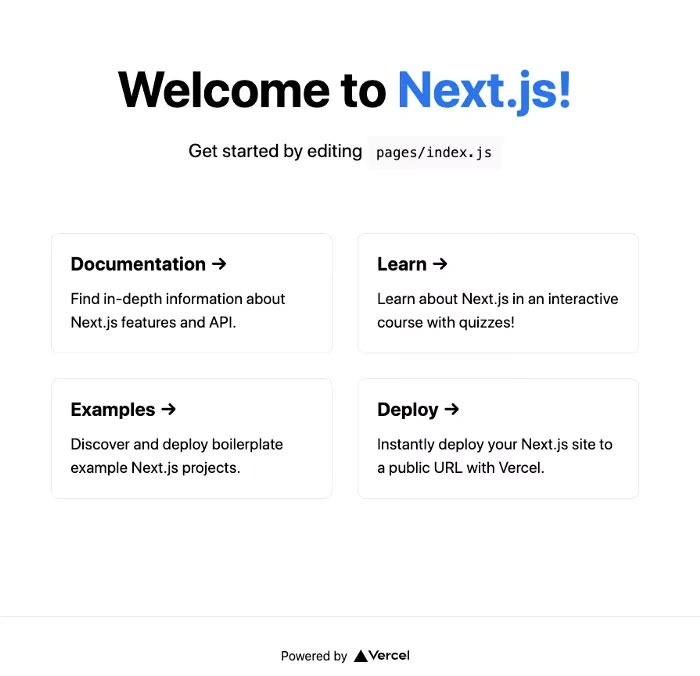
If you visit http://localhost:3000/, you should see the Next.js welcome page:
Installing Bootstrap 5
As mentioned earlier, we’re going to use Bootstrap 5 for our projects. We can start by installing the Bootstrap 5 NPM package:
$ npm install bootstrap@nextInside our /pages/_app.js file, we’ll import the library we just installed:
// /pages/_app.js
import '../styles/globals.css'
import 'bootstrap/dist/css/bootstrap.min.css'; // Added
function MyApp({ Component, pageProps }) {
  return <Component {...pageProps} />
}
export default MyApp
To make sure this works, we can replace everything inside the index.js file with a simple Bootstrap container and some text:
// /pages/index.js
export default function Home() {
  return (
    <div className="container">
      Is this working?
    </div>
  );
};
If you visit http://localhost:3000/ right now, you’ll see that our line of text is centered. If we remove the container from our `div` element, the text will be flush against the left side of our page. This means our Bootstrap is up and running.
Axios
We’ll communicate with Strapi by sending and receiving JSON. We’ll use “Axios” to do the heavy lifting. Let’s install it:
$ npm install axiosThat’s all we need to set up our frontend. Let’s start building the frontend interface.
Creating the UI
We’ll start by creating a static top navigation bar. We’re not going to do anything fancy; instead, we’ll use Bootstrap’s built-in components. We’ll create a separate layout file that will contain our main layout elements.
We’ll create a new folder in the root directory called `components`. Inside the `components` directory, we’ll create a new file called `Layout.jsx`:
// /components/Layout.jsx

const Layout = ({ children }) => (
  <div>
    {children}
  </div>
)
export default Layout;
All of our page’s content will be passed to this component as an argument. In other words, we’ll wrap our page’s content inside this Layout component. Let’s import this component into our index file and place our content inside it:
// /pages/index.js

import Layout from '../components/Layout';

export default function Home() {
  return (
    <Layout>
      <div className="container">
        Is this working?
      </div>
    </Layout>
  );
};
If you go to http://localhost:3000/, everything should look the same.
Inside our components directory, we’ll create a new one. We’ll call it `shared`. Inside this directory, we’ll create a new file called `Navbar.jsx`. We’ll build our navigation (Navbar) here.
// components/shared/Navbar.jsx
const Navbar = () => (
  <nav className="navbar navbar-expand-lg navbar-dark bg-primary fixed-top">
    <div className="container">
      <a className="navbar-brand" href="#">My Portfolio</a>
      <button
        className="navbar-toggler"
        type="button"
        data-bs-toggle="collapse"
        data-bs-target="#navbarText"
        aria-controls="navbarText"
        aria-expanded="false"
        aria-label="Toggle navigation"
      >
        <span className="navbar-toggler-icon" />
      </button>
      <div className="collapse navbar-collapse" id="navbarText">
        <ul className="navbar-nav me-auto mb-2 mb-lg-0">
          <li className="nav-item">
            <a className="nav-link active" aria-current="page" href="#">Portfolio</a>
          </li>
          <li className="nav-item">
            <a className="nav-link" href="#">About me</a>
          </li>
        </ul>
      </div>
    </div>
  </nav>
);
export default Navbar;
Then we’ll import it and add it to our layout file (Layout):
// components/Layout.jsx
import Navbar from './shared/Navbar';
const Layout = ({ children }) => (
  <div>
    <Navbar />
    <div className="main-container container">
      {children}
    </div>
  </div>
)
export default Layout;
By doing this, we’ve created a nice blue navigation bar.
Creating the User Interface (UI)
Now let’s discuss how we’re going to arrange all the portfolio items. I’m thinking of dividing everything into rows and columns, with two items in each row. We can modify our index.js to:
// pages/index.js
import Layout from '../components/Layout';
export default function Home() {
  const entries = ['Project 1', 'Project 2', 'Project 3', 'Project 4'];
  return (
    <Layout>
      <div className="entries">
        <div className="row justify-content-start  ">
          {entries.map((entry) => (
            <div className="col-md-6">
              <div className="entry mb-3">
                <div className="main-image">
                  <img src="https://via.placeholder.com/600x400" />
                  <h1>{entry}</h1>
                  <p>
                    About
                    {' '}
                    {entry}
                  </p>
                </div>
              </div>
            </div>
          ))}
        </div>
      </div>
    </Layout>
  );
}
Let’s see what’s happening here. We’ll create four portfolio entries using an array. A little later, we’ll replace the array with actual content.
We’ll add some CSS to this. In the `public/` folder or the `styles/` folder, you’ll find a CSS file named `globals.css`; we’ll delete its contents and replace them with:
// publi/globals.css
.main-container {
  padding-top: 70px;
}
.entries .main-image img {
  width: 100%;
  display: block;
}
It should look something like this:
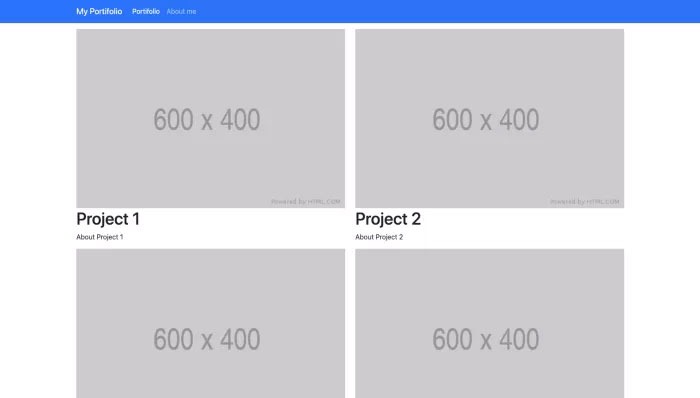
For now, we’re just using placeholder images. Later, we’ll replace them with appropriate images and also use the Image component in Next.js.
User Interface (UI) for a Single Portfolio Item
Now that we have a homepage where we can display all the items in our portfolio, we should think about creating a page that displays a single portfolio item.
This is where Next.js’s routing system comes into play. You see, every file in the `pages` directory is a route. So, if you create a file and component named `testpage.jsx` and navigate to http://localhost:3000/testfile, you should see the component’s content.
This is incredibly cool, and it’s one of the things that makes Next.js so great. It also works with dynamic content. If you enclose the filename in square brackets, Next.js will treat it as a dynamic file.
We’ll create a new folder inside the `pages` folder, which we’ll call `portfolio`. Inside this folder, we’ll create a file called
// pages/portfolio/[slug].jsx

const PortfolioItem = () => {
  return (
    <div>
      This is a test component
    </div>
  );
};
export default PortfolioItem;
No matter which URL you use, Next.js will display the same component.
http://localhost:3000/portfolio/(45231
http://localhost:3000/portfolio/test
http://localhost:3000/portfolio/fsdfsdfsdfs
The component simply sits there patiently, waiting to be populated with dynamic data that will be shown to our wonderful visitors.
// pages/portfolio/[slug].jsx

import Layout from '../../components/Layout';
const PortfolioItem = () => {

  return (
    <Layout>
      <div className="row">
        <div className="portfolio-image text-center mb-4">
          <div className="col-md-12">
            <img src="https://via.placeholder.com/1000x500" />
          </div>
        </div>
      </div>
      <div className="row">
        <div className="portfolio-content">
          <div className="col-md-12">
            <div className="portfolio-headline text-center m-2">
              <h1>Project</h1>
            </div>
            <p>
              Sed ut perspiciatis unde omnis iste natus error sit voluptatem accusantium
              doloremque laudantium, totam rem aperiam, eaque ipsa quae ab illo inventore veritatis
              et quasi architecto beatae vitae dicta sunt explicabo. Nemo enim ipsam voluptatem
              quia voluptas sit aspernatur aut odit aut fugit, sed quia consequuntur magni dolores
              eos qui ratione voluptatem sequi nesciunt. Neque porro quisquam est, qui dolorem i
              psum quia dolor sit amet, consectetur, adipisci velit, sed quia non numquam eius
              modi tempora incidunt ut labore et dolore magnam aliquam quaerat voluptatem. Ut
              enim ad minima veniam, quis nostrum exercitationem ullam corporis suscipit
              laboriosam, nisi ut aliquid ex ea commodi consequatur? Quis autem vel eum iure
              reprehenderit qui in ea voluptate velit esse quam nihil molestiae consequatur,
              vel illum qui dolorem eum fugiat quo voluptas nulla pariatur?
            </p>
          </div>
        </div>
      </div>
    </Layout>
  );
};
export default PortfolioItem;
For the most part, this is just a placeholder for our real data. A single portfolio page should now look something like this:
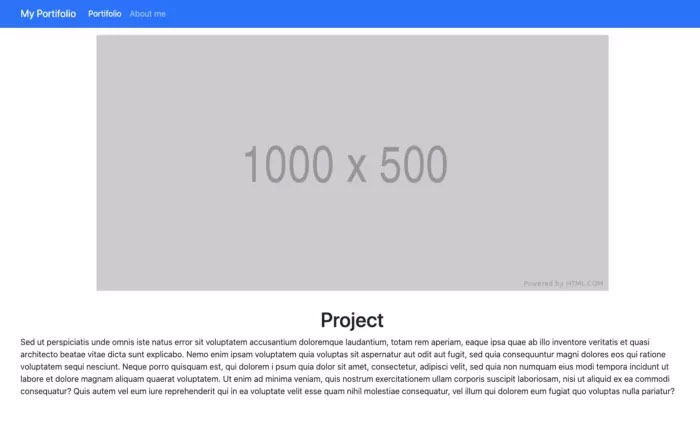
I never said it would look pretty.
Our homepage displays all portfolio items. We also have a page with a single portfolio item. We need to deploy and run our Strapi backend before we return to our app’s front end. Once we’ve launched the Strapi backend, we’ll be able to populate it with content that will be used in the front end.
Setting Up the Engine
Installation
As mentioned earlier, Strapi is a full-fledged headless CMS with built-in engine capabilities. If you’ve never worked with Strapi before, it’s a great fit for you.
Strapi has its own project generator. We’ll exit (cd) from our external application and create the server-side component side by side:
my-portfolio $ cd ..
$ yarn create strapi-app portfolio-backend --quickstart
After installation, the server will start automatically. You’ll be taken directly to a new tab in your browser:
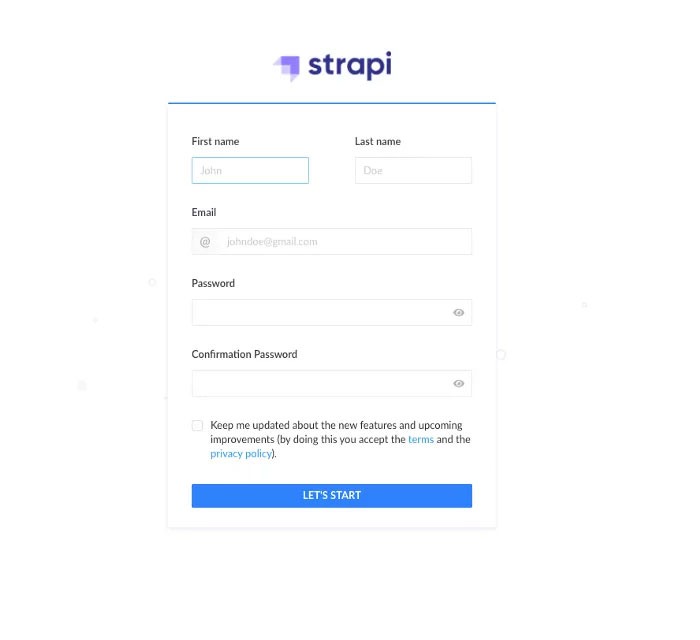
This will be your main login information. Fill it out correctly to avoid any issues during development.
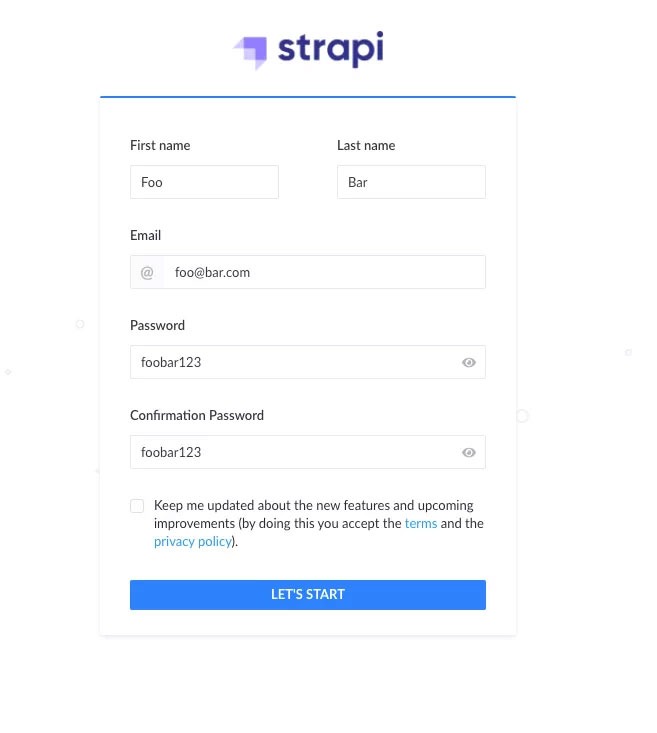
Awesome! Once you’ve created your account, you should see the Strapi main dashboard:
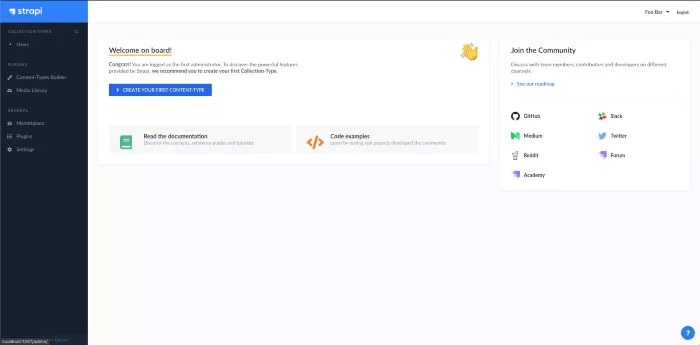
Essentially, this is a graphical interface for your database. This means we can create tables with content, just like in a regular database.
Collections
In the left-hand menu, under Plugins, you’ll see the Content-Type Builder. Here, you can create different data types.
The Single type is exactly what it sounds like. It’s a single data type. It could be a piece of static text or something similar.
The Collection type is a type that contains many elements. In our case, the Collection type will contain many portfolio items. This would also be the right choice if you were creating a blog, a newspaper, or anything else with multiple entries that you’d want to display on the front end.
Let’s set up a Collection type—Portfolio.
Click the “Create a new collection type” button and enter a name for the collection.
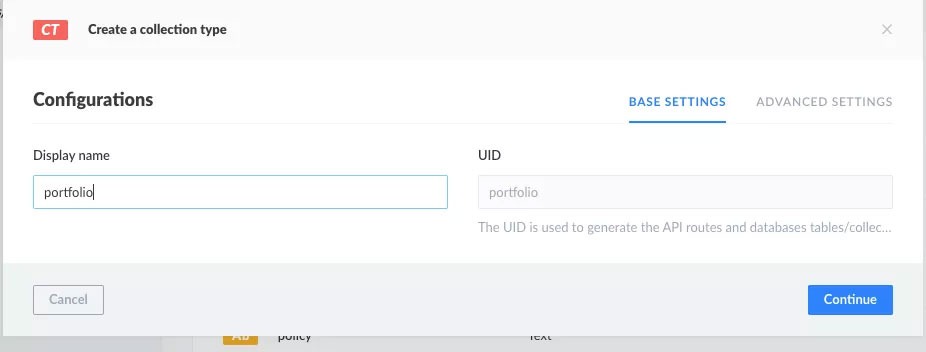
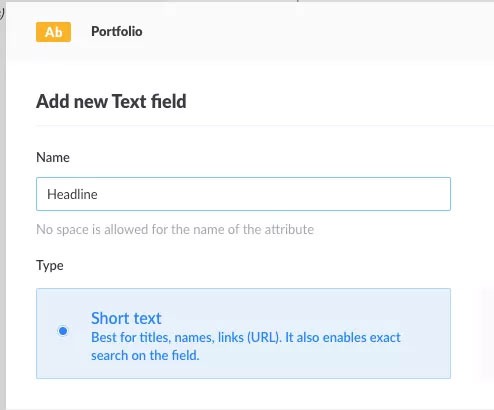
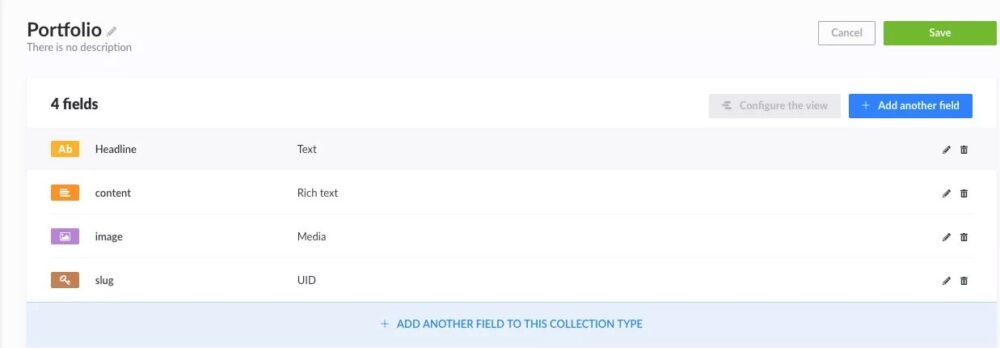
When you’re done, click “Continue.” Next, we need to figure out which data fields we want to use. I’m thinking of these:
- Headline
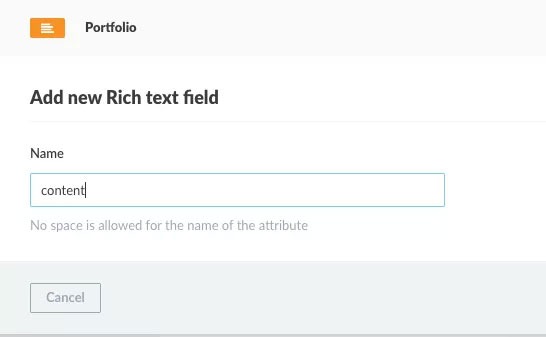
- Content
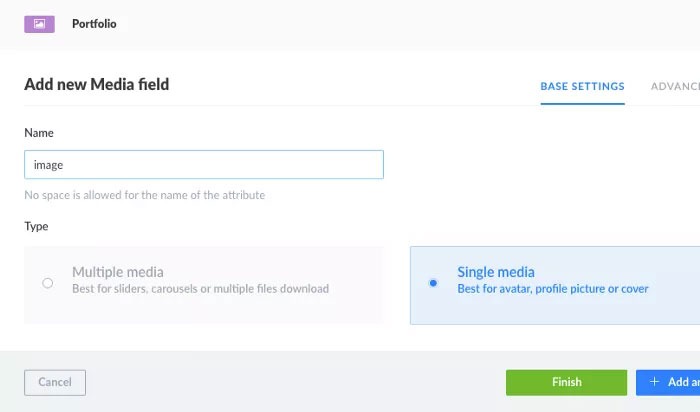
- Image
- slug id
For the headline, we’ll create a new Text field and name it “Headline.”
For our content, we’ll create a Rich Text field:
For our main image, we’ll create a Media field:
For our slug (URL), we’ll create an “id” field and set it to “Headline”:
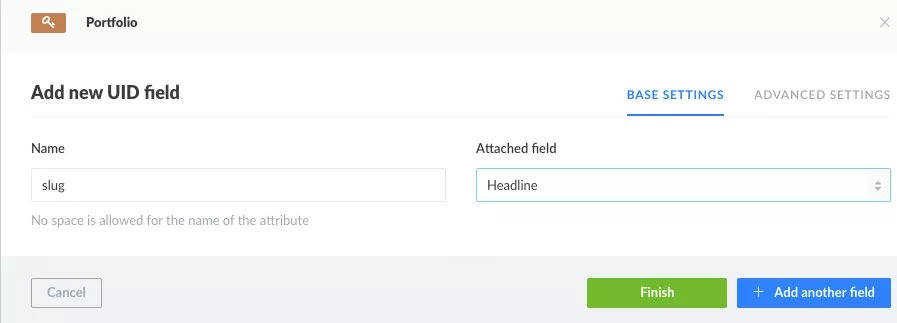
This should give us 4 fields, and we can create them by clicking “Save”:
The server will restart and apply all our changes. After that, you’ll notice that our portfolio type appears in the list of collection types in the left-hand menu:
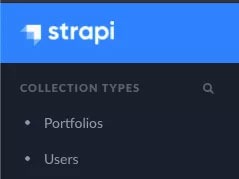
Did you notice that it was automatically written in the plural? That’s because it can contain multiple portfolios. This wouldn’t happen with the “Single” type.
Permissions
Permissions. The next step is to add permissions. By default, Strapi is completely closed off, so you’ll need to manually select which types of requests should be publicly accessible. In the left-hand menu, click “Settings,” then click “Roles” Roles in the “Users & Permissions Plugin” section.
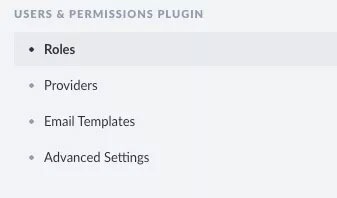
Here, we can set permissions for authenticated and public APIs. Since we’re going to create our portfolio items directly within our CMS, we don’t need to worry about authentication. Select “Public” here:
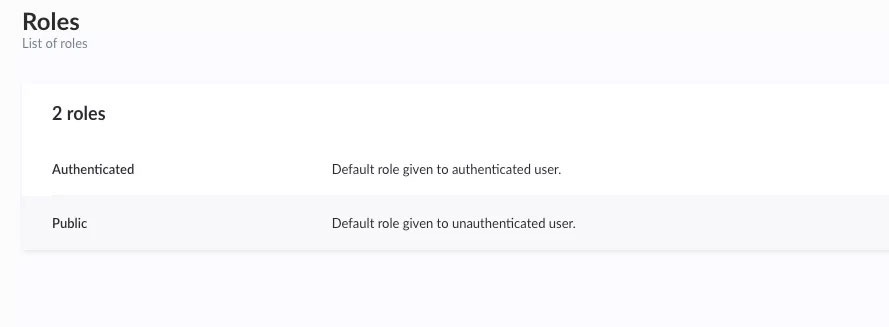
We want the public API to be open only for viewing all or individual portfolio items:
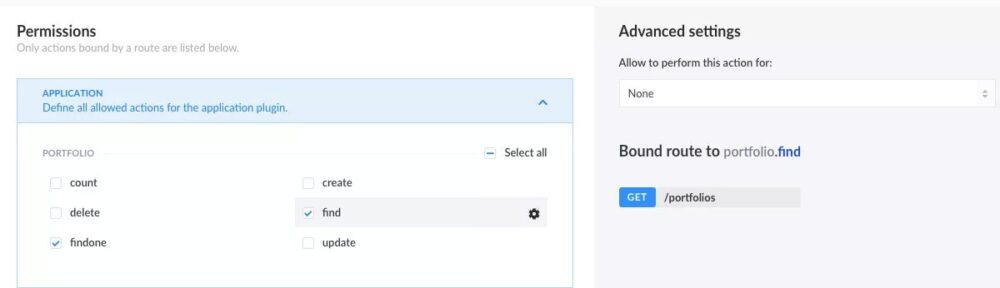
When adding find and findone we make the routes /portfolios/:id and /portfolios available. Click save and navigate to our new Portfolios collection type.
Adding a Portfolio Item
We don’t have any portfolio items yet. Let’s create one! Click on Add New Portfolio in the top-right corner. We’ll also need an image. I’ve picked a random photo that I’ll use:
https://unsplash.com/photos/tZc3vjPCk-QWe can add a new image by clicking in the top-right corner of the image field:
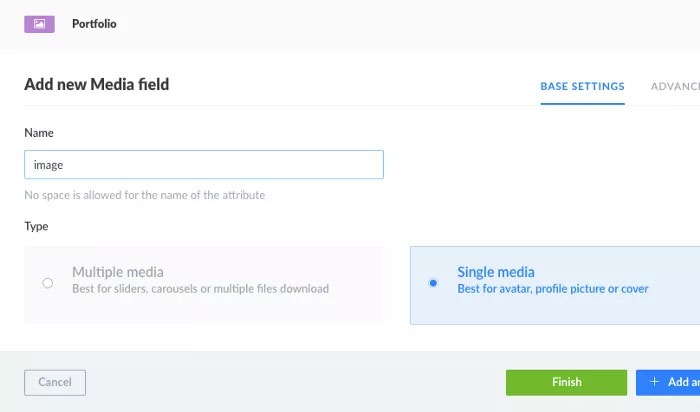
Upload Resources:
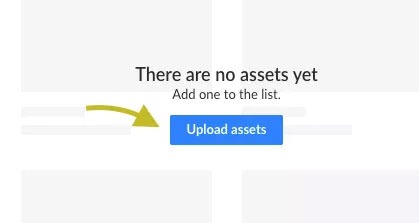
We can choose between uploading from our local computer or via a URL. I’m adding the image URL:
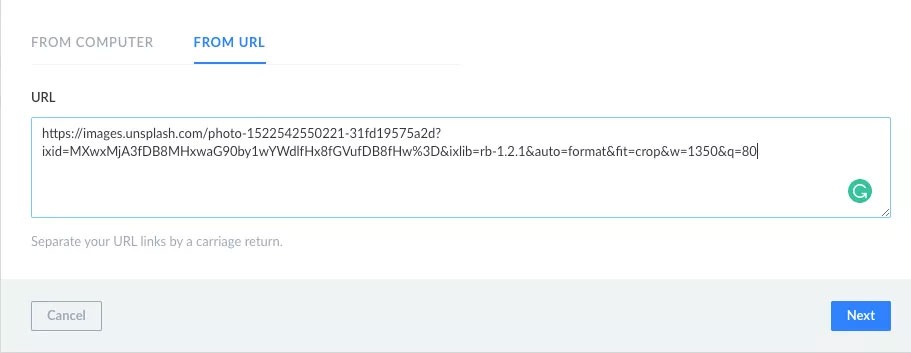
Then select “Upload” and “Finish”:
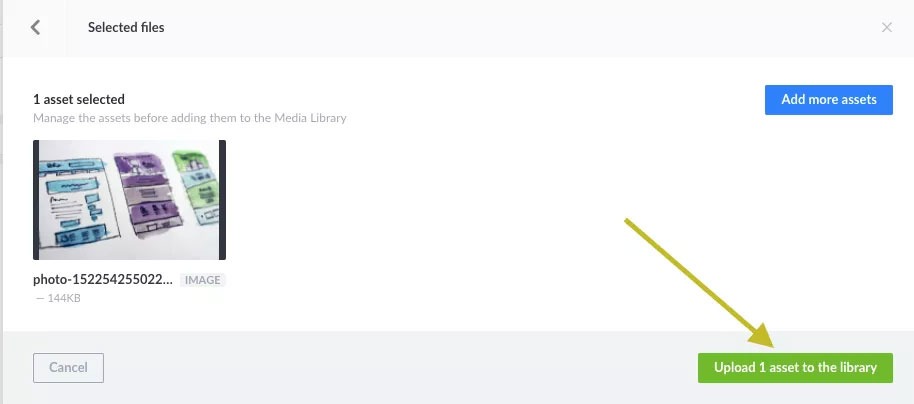
This should add our image directly to our portfolio. Let’s fill in the rest of the fields.
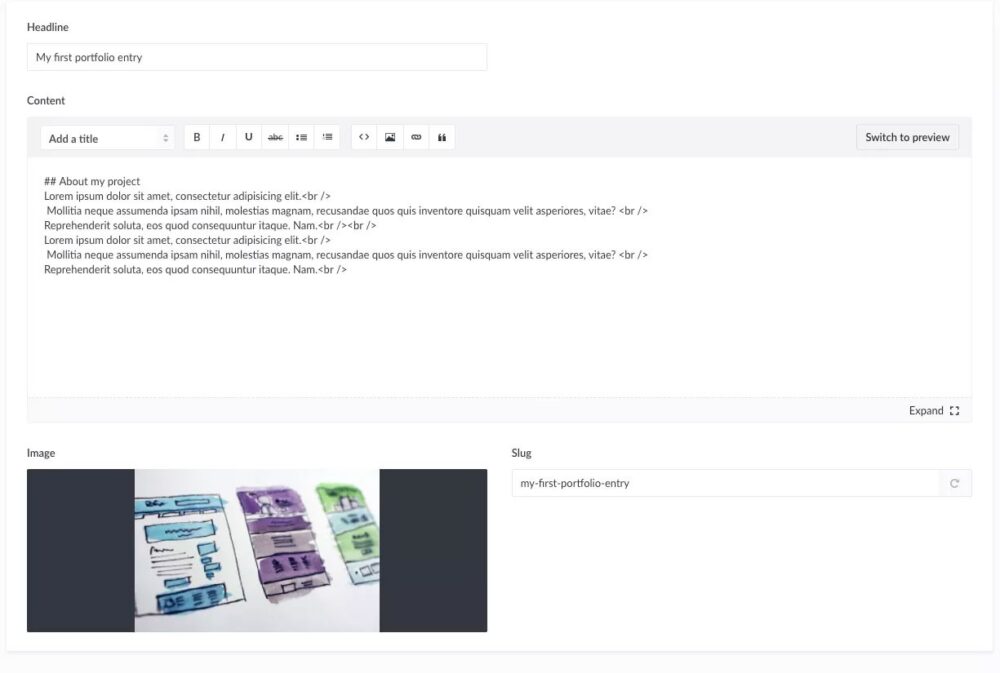
Note that the slug was filled in automatically. If for some reason this doesn’t work for you, fill it in manually with hyphens between each word. It should resemble your title.
Click “Save.” The portfolio item has been created. We also need to click “Publish” to make it available via the API.
If you go to http://localhost:1337/portfolios, you’ll see our newly created portfolio entry in JSON format.
In the next section, we’ll return to our interface.
Don’t forget that your backend must be running while you’re working on the frontend.
Frontend: Reading and Displaying Data
In this part of the article, you’ll see how well Strapi and NextJS work together. This is where they really show their strength!
Retrieving Data
First, we’ll write a function that fetches data from our CMS. In the root directory, create a new folder named `lib` and a file named `service.js` inside it. This file will be responsible for retrieving data from the CMS. I’m using axios for this. If you prefer the fetch library, go ahead and use that instead.
// lib/service.js
import axios from 'axios';
const fetchFromCMS = async (path) => {
  const url = `http://localhost:1337/${path}`;
  const res = await axios.get(url);
  return res.data;
};
export default fetchFromCMS;
So, we’re basically just making requests GET to our CMS to retrieve elements. We should be able to handle everything from our `index.js` file. Let’s see how to do that.
Displaying Data
What makes Next.js so great is its ability to render content on the server side. This is how we’ll display the items in our portfolio.
getStaticProps() — the preferred way to retrieve static data from a CMS. In our index.js file, we’ll import our new fetch function and implement getStaticProps():
// pages/index.js
// .....
import fetchFromCMS from '../lib/service';
export default function Home({ portfolioItems }) {
  console.log(portfolioItems);
  // ....
}
export async function getStaticProps() {
  const portfolioItems = await fetchFromCMS('portfolios');
  return {
    props: { portfolioItems },
    revalidate: 1,
  };
}
We retrieve data from our function fetchFromCMS() and pass it as an argument to the main function. This happens automatically. The revalidate basically tells Next.js how often it should re-render this page and the data.
If you set it to 30, it will re-render every 30 seconds. This means that new entries won’t be visible until the app re-renders. That’s pretty cool. This means we serve clean HTML, JS, and CSS to the client—without querying the database. This will make the site fast.
Also, the function getStaticProps() runs on the server side, while the main function runs on the client side. Nice.
When the page refreshes, the contents of our database appear in the browser console:
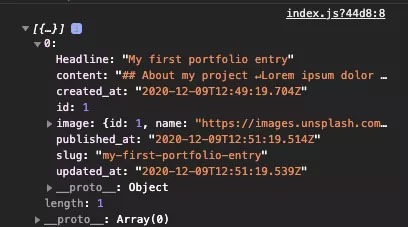
Insanely cool! Let’s visualize this in our React component:
// pages/index.js
// ...
export default function Home({ portfolioItems }) {
  return (
    <Layout>
      <div className="entries">
        <div className="row justify-content-start ">
          {portfolioItems.map((portfolio) => (
            <div className="col-md-6">
              <div className="entry mb-3">
                <div className="main-image">
                  <Image
                    src={portfolio.image.name}
                    width={600}
                    height={400}
                    alt={portfolio.Headline}
                  />
                  <h1>{portfolio.Headline}</h1>
                </div>
              </div>
            </div>
          ))}
        </div>
      </div>
    </Layout>
  );
}
// ....
We iterate through the portfolio items, just as we did with the placeholder elements. Note that we no longer use the
Next.js offers a better option! Their recently released React component will generate a .webp file from your image, resulting in faster loading times. It also comes with lazy loading enabled and will be responsive! If I understand correctly, required fields width and height accept values max-width and max-height.
However, the image component is a bit strict. You can’t implicitly add images from outside the app without whitelisting the URL. So, the next step is to create a configuration file in our root directory, `next.config.js`, and add the following to it:
// config.next.js

module.exports = {
  images: {
    domains: ['images.unsplash.com'],
  },
};
Next.js will throw an error and give you the exact URL you need to enter. In this case, I’ll whitelist the Unsplash URL. Awesome. You’ll need to restart the app.

We’ve gathered all the data and set everything up correctly. Surprised? I went a step further and created a few more portfolio items:

Viewing Individual Portfolio Items
Ready for some more magic? We need to make our portfolio items clickable. When you click on an item, you’ll be taken to that item’s page. On our index.js page, we’ll use a component built into Next.js Link. It works just like react-router. We’ll wrap our items in a component:
// pages/index.js
import Link from 'next/link';
// ....
export default function Home({ portfolioItems }) {
  return (
    <Layout>
      <div className="entries">
        <div className="row justify-content-start  ">
          {portfolioItems.map((portfolio) => (
            <div className="col-md-6">
              <div className="entry mb-3">
                <Link as={`/portfolio/${portfolio.slug}`} href="/portfolio/[id]"> // this gets added
                  <div className="main-image">
                    <Image
                      src={portfolio.image.name}
                      width={600}
                      height={400}
                      alt={portfolio.Headline}
                    />
                    <h1>{portfolio.Headline}</h1>
                  </div>
                </Link> // this gets added
              </div>
            </div>
          ))}
        </div>
      </div>
    </Layout>
  );
}
// ....
If you try clicking on any of the items, you’ll be taken to the item’s page that we created earlier. Let’s see how we can populate it with the correct data.
In our getStaticPaths), which will build dynamic routes during the build process.
// pages/portfolio/[slug].jsx
// ....
export async function getStaticProps({ params }) {
  const portfolio = await fetchFromCMS(`portfolios?slug=${params.slug}`);
return {
    props: { portfolio: portfolio[0] },
    revalidate: 1,
  };
}
getStaticProps() It’s very similar to the one in the index file, except that we’re selecting a single item by the name of the “portfolio” tag we created in Strapi. Since it’s an array, we’ll pass the data at index 0 to the client function.
// pages/portfolio/[slug].jsx
// ....
export async function getStaticPaths() {
  const portfolios = await fetchFromCMS('portfolios');
return {
    paths: portfolios.map((portfolio) => ({
      params: {
        slug: portfolio.slug,
      },
    })),
    fallback: false,
  };
}
// ....
This will be used during build time. It retrieves all portfolios and creates a URL from the slug name. We’ll be able to serve static pages instead of querying the database every time. Note that we used revalidate in the function getStaticProps(). You’ll likely want to set this to a value greater than 1 in production; otherwise, it kind of defeats the whole purpose.
Now we can use the passed argument in our client-side function. The entire
// pages/portfolio/[slug].js
import Image from 'next/image';
import Layout from '../../components/Layout';
import fetchFromCMS from '../../lib/service';
const PortfolioItem = ({ portfolio }) => {
  return (
    <Layout>
      <div className="row">
        <div className="portfolio-image text-center mb-4">
          <div className="col-md-12">
            <Image
              src={portfolio.image.name}
              width={1000}
              height={500}
            />
          </div>
        </div>
      </div>
      <div className="row">
        <div className="portfolio-content">
          <div className="col-md-12">
            <div className="portfolio-headline text-center m-2">
              <h1>{portfolio.Headline}</h1>
            </div>
            <div dangerouslySetInnerHTML={{ __html: portfolio.content }}/>
          </div>
        </div>
      </div>
    </Layout>
  );
};
export async function getStaticPaths() {
  const portfolios = await fetchFromCMS('portfolios');
return {
    paths: portfolios.map((portfolio) => ({
      params: {
        slug: portfolio.slug,
      },
    })),
    fallback: false,
  };
}
export async function getStaticProps({ params }) {
  const portfolio = await fetchFromCMS(`portfolios?slug=${params.slug}`);
return {
    props: { portfolio: portfolio[0] },
    revalidate: 1,
  };
}
export default PortfolioItem;
And if you try it:
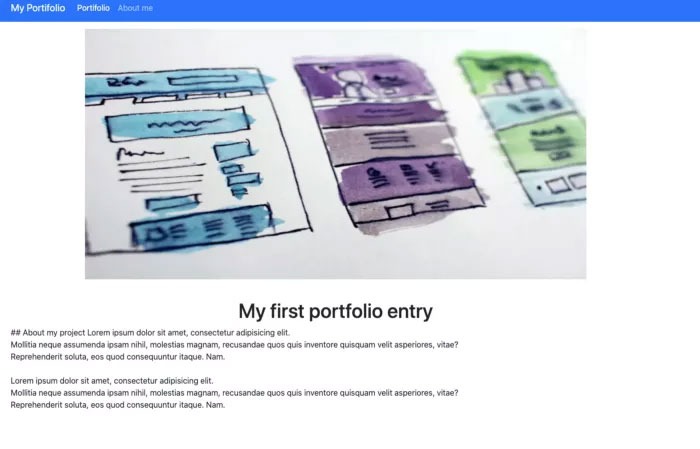
The data is displayed correctly!
The data is in Markdown format. To format it correctly, you’ll need to use a Markdown parser. What you can do is add a new file to your `lib` folder with a function that processes the text content before you pass it to the client-side function. For example:
// lib/processMarkdown.js
import remark from 'remark';
import html from 'remark-html';

// process markdown to html and return
const processMarkdown = async (markdown) => {
  const process = await remark()
    .use(html, {sanitize: true})
    .process(markdown.content);

  return process.toString();
};

export default processMarkdown;
That was fun. I hope you enjoyed it as much as I enjoyed writing this guide. Next.js and Strapi are an amazing combination and my go-to technology for building fast and reliable dynamic websites. And the best part?

Everything is rendered on the server side! Search engine crawlers can easily crawl your site. Visitors can easily find your information! Using Strapi is probably easier than writing a new admin panel to add articles, items, or whatever else you need to add to the database.
And the best part? Everything is easily customizable. Plus, it’s open source. You can make it look exactly the way you want. It also has strong support from the community and Strapi itself.
The same can be said for Next.js. It’s an incredibly handy tool for building high-performance websites that serve dynamic content (which behaves like static content). And it’s very easy to deploy. I recommend hosting your Next.js app on Vercel. The support from the folks at Next.js is also excellent.
We used Bootstrap 5, but only superficially. If you’d like, I can always write a blog post about it. However, the best thing about Bootstrap 5 is that it no longer comes bundled with jQuery, which, in my opinion, is a very good decision by the Bootstrap team.
Project repository:
https://github.com/Devalo/create-portfolio-with-next-strapi