Let’s take a look at how to create a form using Ajax and PHP to send data from a website to an email address.
Introduction
A key feature of many websites is the contact form; one could say that the very essence of websites on the web is interacting with users through these forms. Standard forms work perfectly well, but we can make them more user-friendly and responsive. An AJAX-based form for sending data will run in the background.
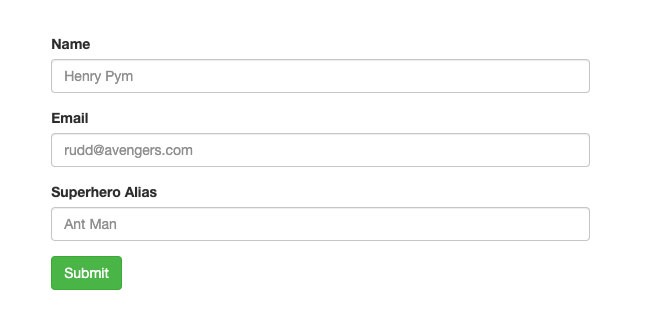
Visually, the AJAX contact form looks no different from regular forms
In addition, we’ll use jQuery to simplify the JavaScript code and a simple PHP mail script to handle sending the form data via email.
This material is based on an article by the TreeHouse.com team, which I’ve expanded upon a bit. All the necessary files will be available for download at the end of the article.
You can read about the Ajax technology itself (Asynchronous JavaScript and XML) on Wikipedia.
Creating an HTML Form
Any Ajax-based form starts with an HTML form that collects data from the user.
Assign an ID ajax-contact for your form <form>, set post an attribute for method and mailer.php as the attribute action. Overall, this is a standard HTML form, and there’s nothing unusual about it.
<form id="ajax-contact" method="post" action="mailer.php">
    <div class="field">
        <label for="name">Name:</label>
        <input type="text" id="name" name="name" required>
    </div>

    <div class="field">
        <label for="email">Email:</label>
        <input type="email" id="email" name="email" required>
    </div>

    <div class="field">
        <label for="message">Message:</label>
        <textarea id="message" name="message" required></textarea>
    </div>

    <div class="field">
        <button type="submit">Send</button>
    </div>
</form>
We’ve created a simple form that includes fields for collecting the user’s name, email address, and message text.
Note that each form field has a required (required). In browsers that support HTML5 form validation, this will prevent the form from being submitted until all fields are filled out.
Next, you need to create a <div>, which will be used to display success and error messages to the user. Create this element above <form> in the HTML markup and assign it the ID form-messages.
Since our Ajax callback form will <div>, we’ll write messages here and display them to the user on the screen:
<div id="form-messages"></div>Next, download the archive containing the files at the end of the article and copy the style.css file to your project directory. You’ll also need to add an element <link>, which will link this stylesheet.
<link rel="stylesheet" href="style.css">Finally, you need to create two elements <script> that reference the jquery-2.1.0.min.js and app.js files. Add them immediately before the closing </body>.
<script src="jquery-2.1.0.min.js"></script>
<script src="app.js"></script>
It’s important that you load the jquery-2.1.0.min.js file first, since the code inside app.js requires jQuery.
That’s all the HTML you’ll need for this article. Next, let’s look at the JavaScript.
One more note—TreeHouse used an older version of jQuery, and you won’t encounter any errors if you follow all the steps described in this article. But below, I’ll explain how to update jQuery and make the code work.
Submitting a Form Using Ajax
Since our form submission uses AJAX, we can’t do without JavaScript. Create a new file in your project directory named app.js. It will contain all the code responsible for submitting form data using AJAX.
Copy the following code into the app.js file.
$(function() {
    // Get the form.
    var form = $('#ajax-contact');

    // Get the messages div.
    var formMessages = $('#form-messages');

    // TODO: The rest of the code will go here...
});
Here, we’ve created two new variables, form and formMessages, which reference the corresponding elements in your HTML markup.
Next, you need to create an event handler that will intercept the form submission submit. You can do this using the submit jQuery.
// Set up an event listener for the contact form.
$(form).submit(function(event) {
    // Stop the browser from submitting the form.
    event.preventDefault();

    // TODO
});
Here, you passed a function to the method submitthat will execute when the user submits the contact form. You also told the browser not to submit the form, as is normally done via the preventDefault for the event.
Next, you need to serialize the form data. This will convert the data entered by the user into a key/value string that can be sent via an AJAX request. Use the jQuery method serialize method to serialize the form data, and then store the result in a variable named formData.
// Serialize the form data.
var formData = $(form).serialize();
Now you’re ready to write the code that sends the form data to the server and processes the response. Copy the following code into your `app.js` file:
// Submit the form using AJAX.
$.ajax({
    type: 'POST',
    url: $(form).attr('action'),
    data: formData
})
Here, you’re using jQuery’s ajax method to create a new AJAX request. You’ve passed an object to the ajax method that contains a number of properties used to configure the request.
The type specifies the HTTP method to be used for the request; in our case, POST. The url is the location of the script to which the form data will be sent.
You populated this property by extracting the action from the form. Finally, the property data was populated using the variable formDatayou created earlier.
Next, you need to handle a successful response from the server. Copy the following code immediately after the closing parenthesis of the AJAX call. Note that I intentionally omitted the semicolon:
.done(function(response) {
    // Make sure that the formMessages div has the 'success' class.
    $(formMessages).removeClass('error');
    $(formMessages).addClass('success');

    // Set the message text.
    $(formMessages).text(response);

    // Clear the form.
    $('#name').val('');
    $('#email').val('');
    $('#message').val('');
})
This callback method will be invoked if the request completes successfully.
Here, you first need to make sure that the element formMessages has the class success, and then set the text content of that element using the data returned by the mailer script. Finally, you clear the values of each form field.
The last piece of JavaScript you need to write handles what should happen in case of an error. Copy the following code block into app.js:
.fail(function(data) {
    // Make sure that the formMessages div has the 'error' class.
    $(formMessages).removeClass('success');
    $(formMessages).addClass('error');

    // Set the message text.
    if (data.responseText !== '') {
        $(formMessages).text(data.responseText);
    } else {
        $(formMessages).text('Oops! An error occured and your message could not be sent.');
    }
});
The fail (failure) is called if the mail script returns an error.
First, make sure that the element formMessages has the class error. Then it checks whether the AJAX request returned any responseText. If so, use that text to set the element’s content formMessages; otherwise, use a general error message.
This completes the creation of the HTML and JavaScript code needed to build an AJAX-based form. Next, you’ll learn about the mail server script responsible for processing the form data and sending the email.
Creating the PHP Mail Script
Even though our AJAX-based submission form is working, we’ll also be using PHP. It’s time to write a PHP form submission script that will process the form data.
This simple script is responsible for validating the form data and sending an email. If an error occurs, the mail script will return the appropriate status code so that the JavaScript code you wrote earlier is executed in the callback when fail.
Create a new file named mailer.php and copy the following code into it:
<?php

    // Only process POST reqeusts.
    if ($_SERVER["REQUEST_METHOD"] == "POST") {
        // Get the form fields and remove whitespace.
        $name = strip_tags(trim($_POST["name"]));
				$name = str_replace(array("\r","\n"),array(" "," "),$name);
        $email = filter_var(trim($_POST["email"]), FILTER_SANITIZE_EMAIL);
        $message = trim($_POST["message"]);

        // Check that data was sent to the mailer.
        if ( empty($name) OR empty($message) OR !filter_var($email, FILTER_VALIDATE_EMAIL)) {
            // Set a 400 (bad request) response code and exit.
            http_response_code(400);
            echo "Oops! There was a problem with your submission. Please complete the form and try again.";
            exit;
        }

        // Set the recipient email address.
        // FIXME: Update this to your desired email address.
        $recipient = "hello@example.com";

        // Set the email subject.
        $subject = "New contact from $name";

        // Build the email content.
        $email_content = "Name: $name\n";
        $email_content .= "Email: $email\n\n";
        $email_content .= "Message:\n$message\n";

        // Build the email headers.
        $email_headers = "From: $name <$email>";

        // Send the email.
        if (mail($recipient, $subject, $email_content, $email_headers)) {
            // Set a 200 (okay) response code.
            http_response_code(200);
            echo "Thank You! Your message has been sent.";
        } else {
            // Set a 500 (internal server error) response code.
            http_response_code(500);
            echo "Oops! Something went wrong and we couldn't send your message.";
        }

    } else {
        // Not a POST request, set a 403 (forbidden) response code.
        http_response_code(403);
        echo "There was a problem with your submission, please try again.";
    }

?>
This script begins by checking that the request was sent using the POST. If not, the script will return an HTTP 403 (Forbidden) status code and an error message.
Once you’ve verified that the correct HTTP method is being used, you extract the form data into three variables $name, $email and $message. Here, you also use the PHP trimto remove any unwanted spaces.
Next, you check to make sure that none of these variables are empty. If one or more variables are empty, set the response code to 400 (Bad Request) and return an error message to the browser.
Now that you’ve determined the data is valid, you prepare the email by first creating a variable for the email recipient. Then you create variables for the subject, the email body, and finally the email header.
Standard Function mail PHP works perfectly well for the purposes of this article, but there are more reliable ways to send email using PHP.
Basically, that’s it—the AJAX and PHP submission form should work. Open your HTML file in a web browser and test the form. For it to work properly, you’ll need to use a web server that supports PHP and the mailso that everything works correctly.
jQuery Update
The first version of this tutorial used an older version of jQuery (2.1.0). If you’re using a newer version, you’ll need to change the following in the app.js file:
$(function()to
jQuery(function ($)This will allow the JavaScript to work properly with jQuery up to version 3.5.1.
HTML for Bootstrap
If your site is built with Bootstrap, for example, for version 3, you can use an HTML form similar to this:
<div class="container-fluid grey-back">
    <div class="row">
        <div class="container">
            <div class="col-lg-6 col-lg-offset-3">
            <div id="form-messages"></div>
            <form id="ajax-contact" method="post" action="/mailer.php">
                <div class="form-group">
                    <input type="email" id="email" name="email" class="form-control input-lg" placeholder="Ваш email" required>
                </div>
                <div class="form-group">
                    <button type="submit" class="btn btn-lg btn-primary">Отправить</button>
                </div>
            </form>
            </div>
        </div>
    </div>
</div>
This is just an example with a single field for entering an email address. Similarly, add the forms you need using standard Bootstrap tags.
Now everything is definitely ready! Enjoy.
In this blog post, you learned how to create an AJAX-based submission form using PHP to communicate with a mail server script. We used jQuery to simplify the JavaScript code, but you could achieve the same result with standard JavaScript.
Using AJAX on your websites can improve the user experience in a variety of ways, not just with contact forms. The next time you’re building a website, ask yourself how AJAX can help create a more comfortable experience for your users.
